
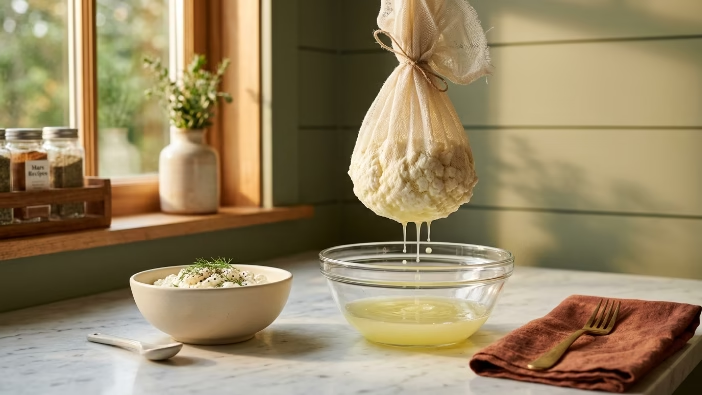
Making homemade cottage cheese is one of those kitchen projects that sounds complicated but is actually surprisingly simple. With just milk, an acid, and salt, you can produce fresh, creamy cottage cheese that tastes noticeably better than most store-bought versions — and you’ll know exactly what went into it.
There are several compelling reasons to make cottage cheese at home. First, the ingredient list is as clean as it gets: milk, vinegar or lemon juice, and salt. No stabilizers, no preservatives, no thickeners with names you can’t pronounce. Second, the cost savings are significant — a gallon of milk produces roughly two cups of cottage cheese, often at half the price of premium brands. Third, you can customize the texture, saltiness, and fat content to your exact preferences.
Ingredients You Need
1. Milk (1 Gallon / 3.8 Liters)
Whole milk (3.25% fat): Produces the creamiest, richest cottage cheese with the best flavor. This is the recommended choice for beginners. One gallon yields approximately 1.5-2 cups of curds.
2% reduced-fat milk: Makes a lighter cottage cheese with slightly less yield. The curds will be a bit softer and the flavor milder.
Skim/non-fat milk: Produces the lowest-calorie cottage cheese, but the curds are drier and less flavorful. Consider adding a small amount of cream back in at the end.
Important: Do not use ultra-pasteurized (UHT) milk. The high-temperature processing alters the protein structure to the point where curds won’t form properly.
2. Acid (Vinegar or Lemon Juice)
White distilled vinegar: The most neutral option. Use 1/2 cup per gallon of milk. Produces clean-flavored curds without any noticeable vinegar taste. This is the most reliable and recommended acid for beginners.
Fresh lemon juice: Use 1/2 cup per gallon of milk. Adds a very subtle citrus brightness to the finished cheese.
Citric acid: Use 1.5 teaspoons dissolved in 1/4 cup of cool water per gallon of milk. Produces the most neutral-flavored curds.
3. Salt and Optional Cream
Use 1/2 to 1 teaspoon of fine salt per gallon of milk, adjusted to taste. For a creamier finished product, you’ll add 2-4 tablespoons of heavy cream or half-and-half to the finished curds.
Equipment
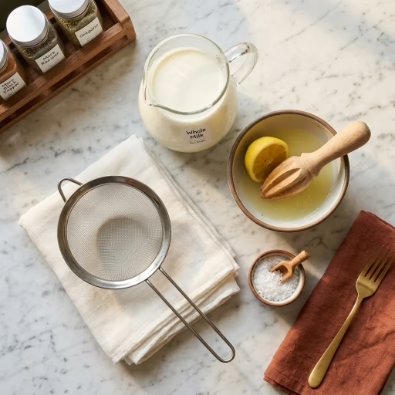
You don’t need any specialized cheese-making equipment. You’ll need a large heavy-bottomed pot (at least 6 quarts), an instant-read thermometer, a long spoon for stirring, a fine-mesh strainer or colander, cheesecloth or a clean thin kitchen towel, a large bowl to catch the whey, and a smaller bowl of ice water for rinsing.
Step-by-Step Instructions
In a hurry? This 10-second clip shows the whole process from milk to curds — watch it once, then follow the detailed steps below.
Step 1: Heat the Milk (10-15 Minutes)
Pour one gallon of milk into your large pot and place it over medium heat. Stir occasionally to prevent scorching. Heat the milk to 120°F (49°C) — warm but not hot. The temperature matters: too low and curds won’t form properly, too high and you’ll get tough, rubbery curds.
Step 2: Add the Acid (1 Minute)
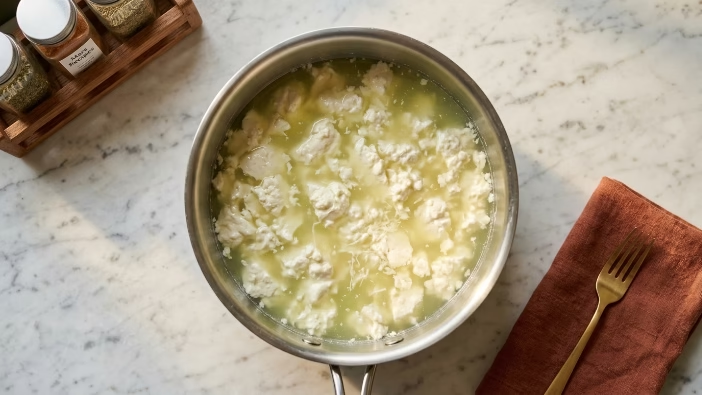
Remove the pot from heat. Slowly pour in 1/2 cup of white vinegar or lemon juice while gently stirring for about 30 seconds. You should see the milk separating almost immediately — the liquid turns yellowish-green (whey) and white clumps (curds) begin forming. If you don’t see separation after a minute, add another tablespoon of acid.
Step 3: Let It Sit (15-30 Minutes)
Cover the pot and let it sit undisturbed for 15-30 minutes at room temperature. The acid continues working on the casein proteins, causing them to clump into curds. Resist the urge to stir. When you check after 15 minutes, you should see clear separation between white curds and yellowish-green whey.
Step 4: Cook the Curds (10-15 Minutes)
Return the pot to low heat and slowly bring the mixture to 140°F (60°C), stirring very gently every few minutes. This helps the curds expel more whey and firms them up. Cook for 10-15 minutes until the curds feel slightly firm when pressed. Undercooking produces softer, moister curds; overcooking makes them rubbery.
Step 5: Drain the Curds (5-10 Minutes)
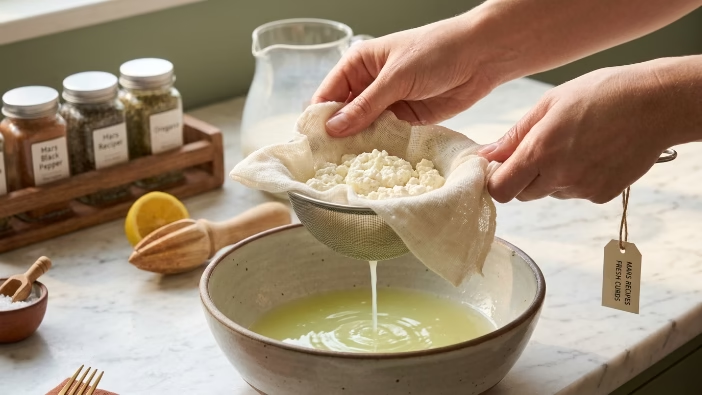
Line your strainer with cheesecloth and set it over a large bowl. Carefully pour the mixture through the strainer. Let the curds drain for 5-10 minutes. For drier cottage cheese, drain longer. Don’t throw away the whey — it’s packed with protein and nutrients.
Step 6: Rinse the Curds (2-3 Minutes)
This is crucial: rinse the curds under cold running water for about 30 seconds. This washes away residual acid taste and cools the curds quickly, giving them a cleaner flavor. For best results, submerge the curds in ice water for a minute before draining again.
Step 7: Season and Dress (2 Minutes)
Transfer drained curds to a bowl. Add salt to taste (start with 1/2 teaspoon). For creamed cottage cheese, add heavy cream or half-and-half, 1 tablespoon at a time, until you reach your desired consistency. Stir gently to combine.
Variations and Flavor Ideas
Herbed Cottage Cheese: Mix in fresh chives, dill, parsley, or basil — about 2 tablespoons per cup. Makes a fantastic spread for toast.
Everything Bagel Cottage Cheese: Stir in 1-2 tablespoons of everything bagel seasoning. This viral combination is addictive with homemade curds.
Sweet Cottage Cheese: Add honey or maple syrup and vanilla extract instead of salt. Top with fresh fruit and granola for breakfast.
Garlic and Black Pepper: Add minced roasted garlic and freshly cracked black pepper. Excellent as a dip or baked potato topping.
Sun-Dried Tomato and Basil: Finely chop sun-dried tomatoes and mix with fresh basil and a drizzle of olive oil. Serve with crusty bread.
Troubleshooting Common Problems
“My curds won’t form.” Most common cause: ultra-pasteurized milk. Other possibilities: milk wasn’t warm enough (needs at least 110°F), or not enough acid. Try adding more acid one tablespoon at a time.
“My curds are too small/powdery.” You likely heated the milk too quickly or stirred too vigorously. Heat more slowly and stir gently next time.
“My cottage cheese tastes sour.” The rinsing step was too brief. Rinse curds thoroughly under cold water — at least 30 seconds with an ice bath.
“Too dry.” Reduce draining time and/or skip the cooking step. Adding cream at the end is the standard fix.
“Too wet/watery.” More draining time or gently press the cheesecloth to squeeze out extra whey.
Storage and Shelf Life
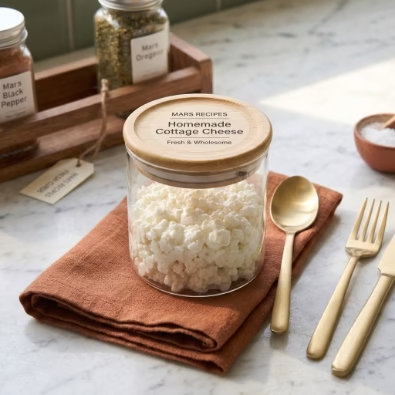
Store homemade cottage cheese in an airtight container in the refrigerator for 5-7 days. It tastes best within the first 3-4 days. You can freeze it for up to 3 months, but the texture will change — use frozen cottage cheese in cooked applications like lasagna, muffins, or pancakes.
What to Do with Leftover Whey
Don’t pour that whey down the drain — it’s protein-rich with plenty of uses. Use it as a smoothie liquid base, replace water with whey in bread recipes for a softer crumb, add it to soups and stews, cook rice or quinoa in whey for added nutrition, dilute with water and use as plant fertilizer, or use as a meat tenderizer and marinade base.
Nutrition Facts (Per Cup, Made with Whole Milk)
Homemade cottage cheese from whole milk provides approximately: 220 calories, 25g protein, 9g fat, 8g carbohydrates, and about 15% DV of calcium. These values shift based on the type of milk used and whether you add cream.
Frequently Asked Questions
How long does it take to make homemade cottage cheese?
About 45-60 minutes total. The active work is only 15-20 minutes — the rest is waiting for the milk to heat and curds to form.
Can I make cottage cheese with plant-based milk?
Traditional cottage cheese relies on casein protein in dairy milk. You can create a similar product with soy milk, but the result will differ in taste and texture.
What type of vinegar is best?
White distilled vinegar is the best all-around choice — neutral flavor that rinses away cleanly. Avoid balsamic or red wine vinegar.
How much cottage cheese does one gallon of milk make?
One gallon of whole milk typically yields 1.5-2 cups of curds (before adding cream). Whole milk produces more curds than skim milk.
Is homemade cottage cheese healthier than store-bought?
Nutritionally very similar. The key advantage of homemade is control — you eliminate preservatives and thickeners, and control sodium exactly. If you use organic milk, you get those benefits at a lower cost than buying organic cottage cheese.
Can I use ultra-pasteurized (UHT) milk for cottage cheese?
No — ultra-pasteurized milk won’t curdle properly because the high heat alters its proteins so curds can’t form. Stick with regular pasteurized whole milk.
Final Thoughts
Making homemade cottage cheese is one of the most rewarding kitchen projects you can take on. It’s simple, requires minimal equipment, and produces a product that’s fresher and often tastier than anything you can buy. Start with whole milk and white vinegar for your first batch, then experiment with different milks, acids, and flavor additions until you find your perfect recipe.
Love making staples from scratch? Put your fresh cottage cheese to work in our 25 high-protein meals, ricotta meatballs, or baked feta pasta.
More protein-packed recipes: Stir it into our creamy chicken penne pasta, or try this high-protein Korean ground beef bowl.
Rate & Review This Recipe